This easy Easter bunny craft for kids is adorable! This project is perfect for beginners using their Cricut. Grab your SVG and make this adorable craft, today!
Don’t you just love Easter?
Easter is one of my favorite holidays, because, not only do we have the opportunity to focus on Christ and the last week of his mortal life, but we also have the chance to make this opportunity exciting for our children.
Now, how in the world does an easy Easter bunny craft have to do with teaching your children about Christ?
These Easter bunnies can be made to write uplifting notes on, used to decorate a garland in your home, or as a bookmark when you share your favorite religious books with your children.
There are so many ways you can use this adorable craft in your home, and the best part is they’re super easy to make and take only minutes.
This post contains affiliate links at no cost to you. Thank you for your support. If you have any questions, please read my disclosure policy here.
One of my goals is to provide you with adorable (and easy) crafts that can be made on a busy mom’s schedule. And I know you’re going to LOVE this one.
Quick & Easy Easter Bunny Craft
Supplies Needed:
- Cricut machine (I use the Maker and absolutely LOVE it!)
- White cardstock
- Black cardstock
- Pink cardstock
- Glue stick
- Super glue (optional, but really helpful if you make a garland)
- Ribbon for garland (optional)
Instructions on Assembling the Bunnies
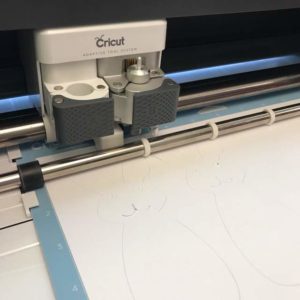
The first thing you’ll want to do is grab the SVG for this design (and if you don’t have a die cutting machine, don’t worry, the PDFs are also available for you to print and use as well).
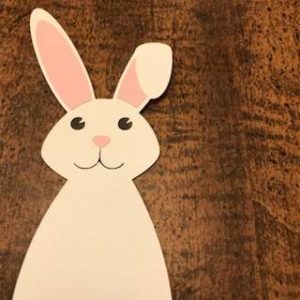
Allow the machine to cut the white cardstock for the bunny’s bodies, the black cardstock for the eyes and nose, and the pink cardstock for the bunny’s ears and the tip of their noses.
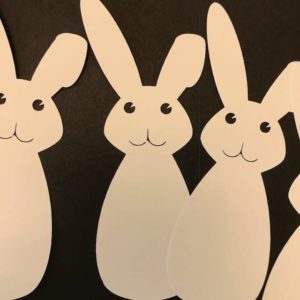
Aren’t they just adorable!?
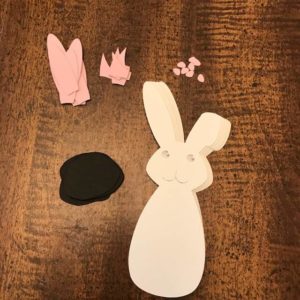
Once all the pieces are cut, carefully remove them and place them in their own groups.
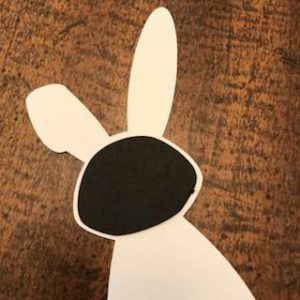
You’ll want to make sure the bunny’s floppy ear is on the left-hand side. Once this is ready, you’ll glue a piece of black cardstock to the back of your bunny’s head (as shown).
Flip the bunny over (with the floppy ear now being on the right-hand side) and continue adding each of the ear pieces and the tip of the nose.
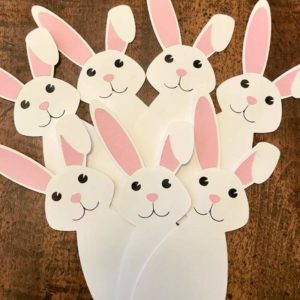
Repeat the process until all of your Easter bunnies are assembled and ready to go!
If you decide to make this into a garland for your mantle or wall, here are some really quick instructions I used for our home this Easter.
You’ll want to find your favorite Easter color of ribbon (I used a 5/8-inch transparent ribbon and the size worked perfectly for what I wanted).
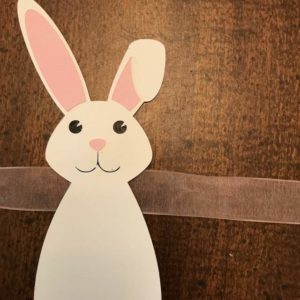
Measure out 15-inches of ribbon before super gluing your first bunny to the ribbon. Place a line of super glue on the back of the bunny’s neck and secure to the ribbon. Be careful not to burn yourself as the super glue will be hot.
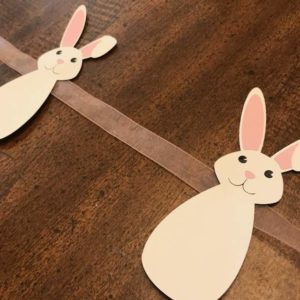
Leave 6-inches between each bunny and place as many of the bunny’s on the ribbon as you need for your project.
Then hang in your home where everyone can see and enjoy the beautiful Easter craft you made.

Micah Klug is a homeschooling mother to five children and an author. She teaches time-tested solutions to help parents remember what matters most in life, including strengthening their home, faith, and family relationships. To learn how a child who grew up in an authoritarian home is now creating an environment of peace and joy in her own home visit this page. If you want to contact Micah, send her an email here or email [email protected].

Cute! I am Cricut-less but that’s an easy enough template to duplicate. Visiting from Tuesdays At Our Home party.
The PDFs for printing are also in the library. Thanks for stopping by! Have a great day.
I really like their one floppy ear and sweet little faces! Turned out really nice 🙂
Thank you so much, friend. I hope you have fun making them. Have a happy day.
My two girls (ages 7 & 3) would have a great time with this craft!
I’m so glad! Let me know how your bunnies turn out. <3
Oh my gosh! These are darling! I love them and this is such a great tutorial! Makes me wish I had my cricut still! #WanderingWednesday
Thank you so much, Michele. For those who don’t have a Cricut, the PDF is easily downloadable and can be printed from home. Thank you for stopping by. Have a great day.
These look great thanks for this, I have scheduled this post for my readers.
Thank you so much, friend! Have a great day.
Super cute! Love hanging up holiday banners. 🙂
This is such a fabulous craft idea! I love a good holiday garland <3
How can I get these files?
Hi Kat! You can find this free SVG in our shop HERE. Happy Easter!