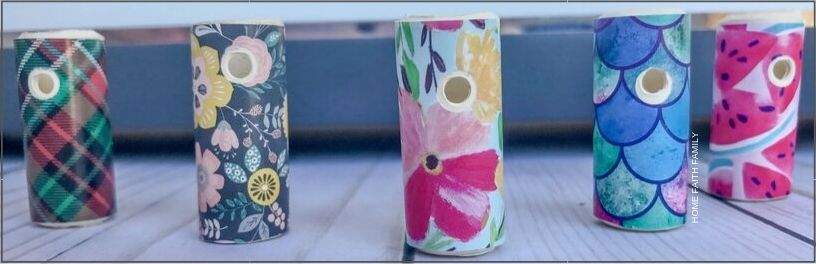
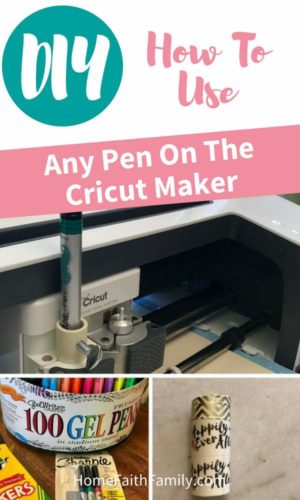
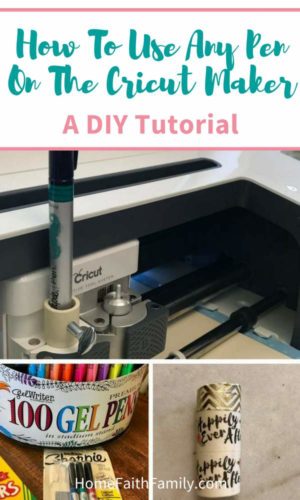
This ultimate Cricut pen adapter is perfect for your next crafting project. These DIY instructions will show you how you can use any standard-sized pen with your Cricut maker or explorer.
This post contains affiliate links at no cost to you. Thank you for your support. Disclosure policy here.
I absolutely love my Cricut Maker but I’m not a fan of how expensive the Cricut brand pens are. The only time it’s worth buying them is when they go on sale at your favorite craft store, but even then, Cricut doesn’t go on sale very often.
My husband surprised me with a Cricut for Christmas (you can grab some awesome tips to eliminate overwhelm on your Cricut and read all about the surprise HERE). I soon found out how pricey projects can quickly become if you don’t already have the crafts on hand.
And expensive when you have little children isn’t in our family’s vocabulary.
So my husband decided to take on a project for me and found a way where anyone can use any standard-sized pen on the Cricut Maker.
And today, we are going to show you how!
Don’t Have Time To Do This Project? Check out this available option:

Check out the affordable pen adapters available in our Shop! You’re going to LOVE the decorative vinyl on your next crafting bestie. Check them out here!
How To make a pen adapter for your Cricut (A DIY Tutorial)
Supplies Needed:
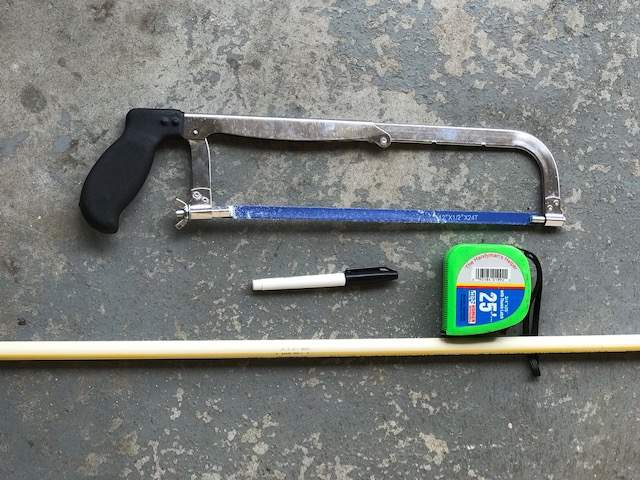
- Handsaw (this one would be great if you don’t have one at your house already).
- Measuring tape
- Permanent marker
- You’ll need 1-inch and 5/16th exact measurement of a 1/2-inch SDR 11 CPVC Tubing (you can easily find this in your local hardware store. We spend less than $3 on 10 feet. Unfortunately they didn’t sell smaller sizes in our store).
- Sandpaper (my husband used medium grit for this project and it worked like a charm).
- A drill with drill bit size 11/64″
- Thumb screw #10 – 24 x 1/2-inch
Instructions for your pen adapter:
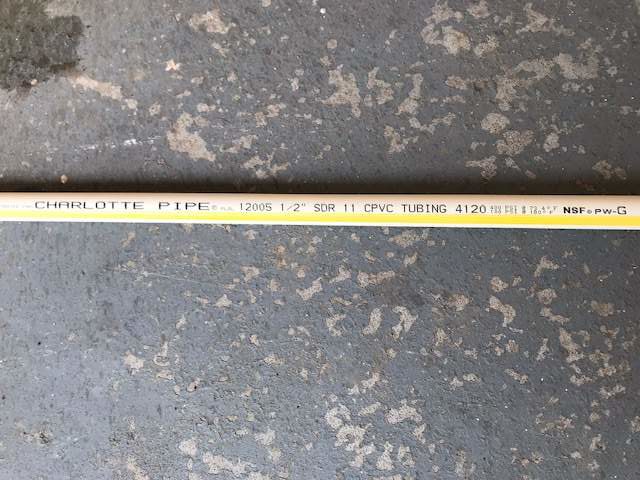
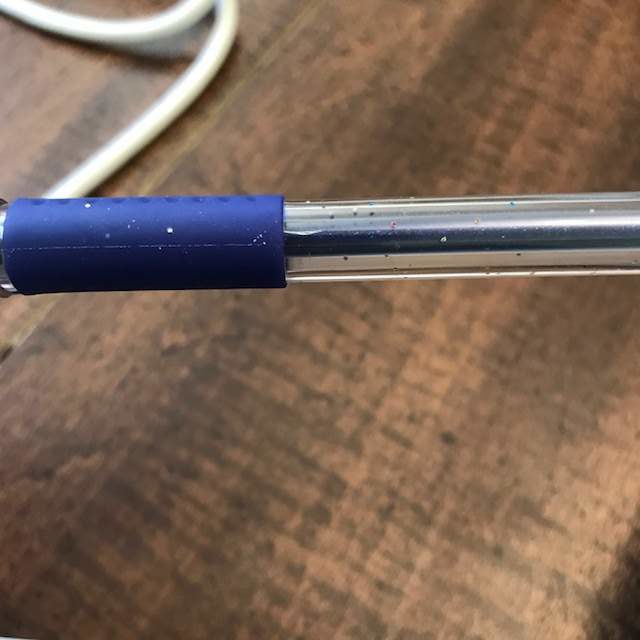
I’m a visual person and need to see things to better understand what in the world is happening. With that in mind, this is what the long piping looks like when you go shopping at the hardware store.
We spent less than $3 for about 10 feet.
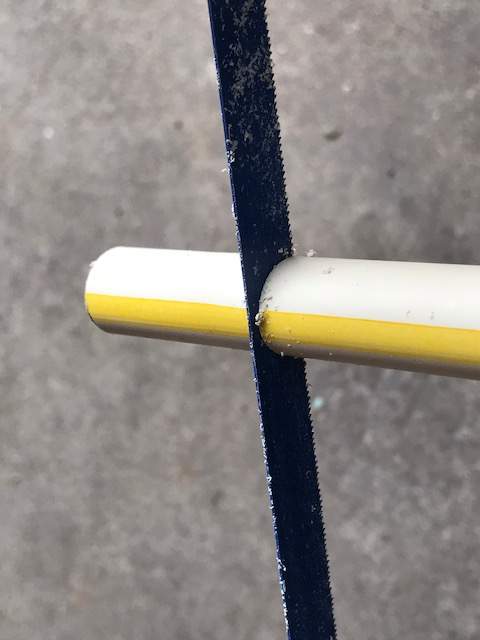
You’ll first want to measure exactly 1-inch and 5/16th in length for the pen guard you’ll be making. Mark your measurement with a permanent marker and safely saw your piece off.
This piece alone will become your new best friend for your Cricut machine and will save you a ton of money.
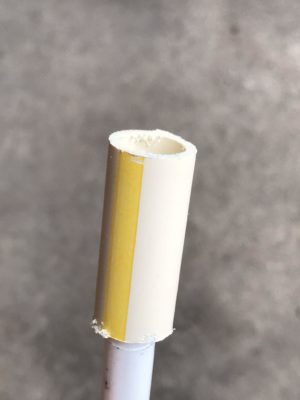
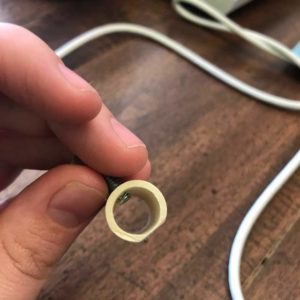
This is what your final pipe piece should look like. Don’t worry if the line you sawed isn’t straight.
If you saw from the end of the pipe then the tip of your smaller piece will be straight and will become your base on your Cricut machine.
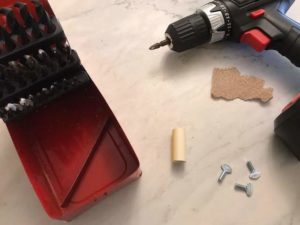
Get out your drill with an 11/64-inch drill bit size and one thumb screw (#10 – 24 x 1/2-inch.)
As a side note, the thumbscrews can easily be found at your local hardware store and are significantly cheaper versus shopping online – just F.Y.I.
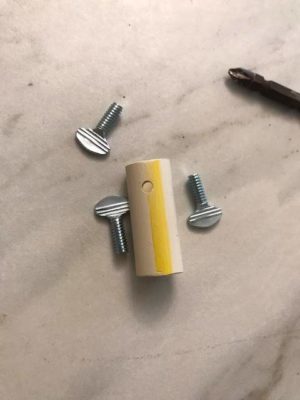
You’ll want to drill a small hole for the thumbscrew to securely fit (about 1/8-1/4-inch of the way down the pipe piece – you can see in the picture where we drilled our hole). Remember to put the flattest end of the pipe facing towards the bottom.
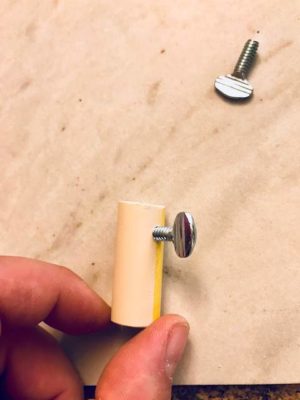
Place the thumbscrew in the pipe and turn clockwise a few turns to make sure this piece is secure.
You want the feel to be “snug” not “oh-my-goodness-this-is-crazy-tight-I’ll-never-use-this-in-my-life.”
Now is the time to get out a sheet of sandpaper.
(Just to let you know you’re nearly done. Yay!)
Sand the opposite side of pipe from the thumbscrew all the way down. (You can see the pattern and thickness of how our pipe was sanded).
DO NOT SKIP THIS STEP!
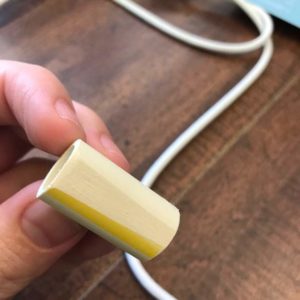
If you don’t sand the pipe then your project will not work on your Cricut Maker. The smooth portion of the pipe will be placed securely and snuggly against your Cricut machine. This will allow the Cricut to move the pipe safely and smoothly up and down when using your pens.
When you’re done with the sanding, feel free to decorate your new piece with some cute washi tape or vinyl. I love my “Happily Ever After” with gold trim. It makes me smile.
Let’s test your new pen adapter!
How do you know what pens work best and how to effectively use this new Cricut tool you created?

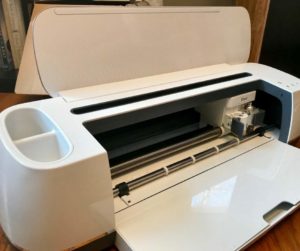
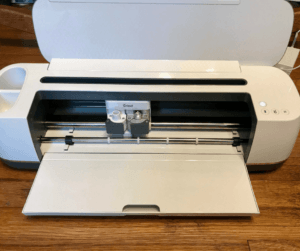
Carefully remove the standard Cricut pen case from your machine and place your new pen adapter with the sanded side facing the back of the machine (your thumbscrew should be facing towards you).
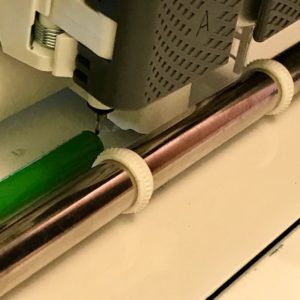
Place a colored pencil below your machine for measurement purposes. The thickness of your pencil is the height that you want the tip of your pen to rest on. (See picture above for a closer look).
Securely tighten your pen in your pen adapter (have the pen rest on the colored pencil). You want your pen to be snug, not death gripped.
Then Design!
Select the design you want to create (whether it’s from the Cricut Design Space or one you created) and let your imagination go wild.
As a word of caution towards your pens – if you put the pen too tightly into your DIY pen adapter, you’ll notice some marks and possibly cracks in plastic pen cases.
This doesn’t damage the pen at all, it just makes the pen look a bit scruffy.
With that in mind, please use this tutorial at your own risk. If you do everything properly as described in this post, you *should* be able to use any standard-sized pen on your Cricut machine.
If you decide you’d rather have someone make this for you, then head on over to my shop page HERE.
I have some adorable vinyl I can decorate your pen adapter with, including the one I use on my machine.
Don’t forget to share this article with someone who has a Cricut machine and wants to learn how to revolutionize their crafts.

Micah Klug is a homeschooling mother to five children and an author. She teaches time-tested solutions to help parents remember what matters most in life, including strengthening their home, faith, and family relationships. To learn how a child who grew up in an authoritarian home is now creating an environment of peace and joy in her own home visit this page. If you want to contact Micah, send her an email here or email [email protected].


This is an excellent tutorial! Can this work on the Cricut Explore One?
Yes, Amy! Because the dimensions of the Cricut Explore One and Maker are the same (just features have changed), this pen adapter will work on any of the Explore lines and the Maker! Have a great day, friend.
I just wanted to say thank you for this tutorial. It worked beautifully!
I’m so glad you found this helpful, Kristen! Enjoy your new pen adapter, friend. =D
I’ve seen these devices for sale, but really grateful for the tutorial since we already have the supplies on hand. Thanks!
Yay! I’m so glad. I plan on posting more tutorials as I learn the machine as well. If you have any specific questions, just let me know. 🙂
Have a great day, Trish.
Thanks so much for the tutorial, my husband made mine for about 50 cents and it works great!
Yay, Mary! I’m so glad you were able to make your own pen adapter. They’re AMAZING! Have a great day, friend.
Great info! Thanks for sharing this with us at Homestead Blog Hop!
Thank you so much, Ann. Have a great day.
Greetings from Eastern Canada! Thanks for your post. The price of Cricut supplies out here is prohibitive. I keep trying cheaper markers to no avail. My question is, how far a depth do you go? The original Cricut piece stops the marker. I’m going to try to make one but I’ll probably end up ordering from you.
Hi Kim! The depth of the pen is determined by using a colored pencil. The method I use is placing a colored pencil down and then inserting the pen I want to use into the DIY pen holder. From there I tighten the pen in place. This has proven to be the exact height the pen needs for each project and works well each time. If you have any other questions, please reach out!
Such a pity you don’t ship to the uk 🙁
I’m sorry about not being able to ship to the UK. The last thing I want to do is charge anyone an arm and a leg for shipping.
Does this work with the explore air 2
You have a great idea. I thought i followed all the steps, but when i tried to put pipe in holder it was to big. I did sand it down just like picture.
I would encourage you to double check your size and measurements. Hang in there. I promise it’s worth it once the adaptor fits. =D
I had the same thing happen to me me and my husband both looked to make sure I didn’t buy the wrong one and when we went to try it out did not fit. Pipe is too thick.
Also, we have become quite handy around here, and I know that the pipe comes 1/2″ OD or 1/2″ inside diameter.
I forgot to tell you I have an Explore Air
I’m so glad to know the adaptor fits well in the Explore Air!
it is me again, My hubby shaved alittle off around the outside and it FIT. I think my pipe was wack.
I’m so glad your adaptor fits! (Aren’t husband’s amazing!?) Yay! Good luck with your projects and let me know what you end up making. Have a happy day, friend.
OMG! How genius! Looking at all the “extras” for these machines and thought I might need a second job just to purchase them. This is really awesome! Micah you rock!
Awe, thanks, Jamey. I’m glad you found this tutorial helpful. I use my adaptor all the time for different projects. It’s saved our family so much money (accessories can quickly become expensive). Have a great day, friend.
This is a great tutorial! My husband had most of the items on hand and with a quick trip to the hardware store he was able to make this within a few minutes! I LOVE my new pen holder!
I’m so glad! Yay! I use mine all the time, so be sure to enjoy.
Hi Micah!
Thanks for the tutorial! Planning on asking my Hubby to make it tonight! Just a question. I have a Cricut Explore Air, how do you remove the cricut pen case thingy?
Thanks!
Sarah
Hi Sarah! I was able to find a quick tutorial on how you can remove the Cricut pen adaptor so your new any-pen adaptor will fit. The video is, https://www.youtube.com/watch?v=hJebPH6lwxw
I hope this helps! Let me know if you have any other questions. Thanks, friend!
Hi, i’m from Argentina, and i have an explore air 2 😁. My question is, does it work with my cricut? Thank you 🙂
Yes, Erika. I’ve had several readers reach out and say how great this tutorial has been for their Explore Air and Explore Air 2.
Thank you so much for this tutorial! I thought the pipe wasn’t going to fit in mine, but then I realized it doesn’t have to fit all the way down, just to the part where it clamps in!
I LOVE IT!!!! THANKS AGAIN!!!
Yay! I’m so happy you found this helpful. I hope you enjoy your new pen adaptor. Be sure to let me know what fun projects you end up creating. I would love to hear about them. =D
I have a first generation Cricit and looking to upgrade to the Maker. I’m a bit surprised this hasn’t been questioned, but when you own any thing like this, it’s important to know. Will this pen adapter or anything that isn’t specifically built for the machines void the warranty. I know if I use refillable cartridges on my printer while the warranty is still in effect, it gets voided. Thank you for the instructions.
That is a GREAT question! From the research my husband and I have both done, no, adding the pen adaptor will NOT void the warranty because no permanent changes are being made. The pen adaptor is simply an added accessory, much like the knife blade, fine tip pen, etc. and does not cause any changes to this beautiful machine.
Those of you having issues with your DIY adapter being too large in diameter have likely purchased 1/2″ PVC tubing/pipe instead of 1/2″ CPVC.
Even though PVC does come in 1/2″ size, its has MUCH thicker walls, and the inner portion of the tube is 5/8″ in diameter.
Thank you, James. Yes, it’s so important to make sure everyone purchases the CPVC instead of the PVC. That one little letter makes ALL the difference. Have a great day, friend.
Since my husband is a plumber/handyman, I’m pretty sure we can make several of these! Haha! My question is, have you noticed any issues with the project lining up, or being off slightly?
Hi Tori! I haven’t had any issues with my pen adapter and neither have any of my customers who purchased our pen adapters. As long as you measure the height of your pen properly, you should be good to go. I hope you and your husband are able to make an adapter soon. You’ll have to let me know how your next project turns out.
Great idea – I love saving money! Do you have to tighten that thumb screw to adjust for each pen?
Hi Pam, you will need to slightly loosen the thumb screw to get your pens in and out of the adapter, and you’ll need to make sure each pen fits snug as well (since different pens have different thicknesses). As long as you tap your hole (which is something we do), you’ll not have any issues adjusting your thumb screw to fit whatever pen you need.
This is a great tutorial. It’s only missing one bit in the instructions. You say to “carefully remove the original pen holder” from the Cricut machine. How do you do that? I can’t tell if it screws in or just pops out but I don’t want to force it and possibly break it! I would love to use this system to use other more affordable pens but I’m stuck at this point. Thanks for any help you can offer.
I completely understand your hesitation to take the original pen holder out of your machine. The best video tutorial I’ve found is done by another craft blogger. She shows you how to safely remove the original pen holder. Then, all you need to do is slip in the new pen adapter and you’re crafting again. You can find this video tutorial HERE.
Oh my goodness, this is amazing! I definitely need to just purchase one from you, don’t have the time to make one myself! I do have a question and not sure if this has already been answered in the comments.
Do you have a list of all the pens this will work with, or will it virtually work with any pen? Is there a certain thickness of a pen or marker that you cannot use with this? Thank you and thank you for this wonderful adapter! I have so many pens and markers that I could use for the Maker and don’t want to spend money on the expensive Cricut ones, so this is a blessing!
Hi Alyssa! I’ve found the pen adapter to work with any standard-sized pen (gel pens, Bic, colored pencils, the thin Crayola markers, etc.) Thank you for such a great question!
Neat trick but I do have a question can this be done with the old Cricut machine? I have the very first machine that came out.
Hi Sonya! Originally designed for the Cricut Maker, this pen adapter can easily be used on the Cricut Explore, Explore Air, Air 2, or Maker (not the Explore One).
Thank you for the tutorial! Unfortunately, living in Australia has made it next to impossible to get things for my Cricut when I want them, and when exploring Etsy for something like this, my choice was the pay $60+ for it or make it myself.
I decided I would make it myself. Next problem, absolutely nowhere has the 1/2-inch SDR 11 CPVC Tubing. It also makes it difficult that Australia is metric, so having to convert made things weird.
So now I’m in the same boat as when I started, no tubing and a cricut maker that’s begging me to put all my other pens in and create! 🙂
I’ll get there eventually and your tutorial is going to eventually help me get there! 🙂
Bless you! I’m so glad you found this tutorial helpful and I hope you’re able to find the right size PVC pipe to create your own adapter.
Do you sell them?
Yes, Megan, I do sell them! You can find the pen adapters on our shop page, HERE. There are also several cute decorative options.
Great idea! I do wonder does it throw off the centering and cause issues with drawings at all?
Thank you for such a great question! I’ve been using my pen adapter since 2017 and I’ve never had any issues with any of the pens/tools I use for cards, drawings, etc. It’s designed to fit in the place of the pen holder and fits securely. Plus, the thumbscrew keeps your writing/drawing tool secure in place as well, so there isn’t any issues with wobbly lines.
It does throw the pen off center a slight amount in relation to the cutter because the thumbscrew pushes the pen over to the back wall of the CPVC tube. This offset is minor and is dependent on how small the pen is in relation to the tube diameter i.e. the more snug the fit, the less error. I found that the error is only significant if I am creating very small Print and Cut projects with tight tolerances like kids reward stickers. In larger projects, it won’t matter if the pen is off center by 2 or 3mm.
Hi!
Does this product work with sharpie markers?
Hi Angela! Yes! This product works with the standard sized Sharpie markers (one of my favorite to use when making cards).
It works! Thanks so much for this tutorial!
Woo hoo! You’re so welcome, friend.
Thank you so much for this tutorial !! You are a life saver!!
I’m so glad you found this helpful! Happy crafting.
Thank you so much! I ran (literally bolted out the door immediately!) to the hardware store, purchased supplies and was able to accomplish in less than 30 minutes thanks to my trusty Dremel. I made my first drawing experiment using a crayola marker immediately and it was wonderful!